You are here:Home » News » Four Steps to Ensure Uniform Tile Joints with Scientific Use of Tile Leveling Systems
Four Steps to Ensure Uniform Tile Joints with Scientific Use of Tile Leveling Systems
Views: 0 Author: Site Editor Publish Time: 2025-05-20 Origin: Site
Four Steps to Ensure Uniform Tile Joints with Scientific Use of Tile Leveling Systems
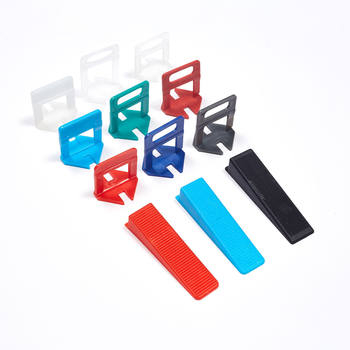
In tile installation, precise application of tile leveling systems (tile leveling system) effectively resolves uneven joint issues. Below is a professional workflow integrating key tools: tile spacers, tile wedges, and tile pilers:
1. Baseline Positioning
After substrate preparation, insert cross-shaped tile spacers at all four corners of each tile to preset 2-3mm joint widths.
Waterproof and rust-resistant spacers are recommended to prevent corrosion from moisture during cement curing.
2. 3D Leveling Adjustment
Vertically insert tile wedges into spacer slots and rotate to adjust tile height differences (controlled within 0.5mm).
Modern wedges made of corrosion-resistant nylon feature triangular locking structures that withstand 200N tensile force, ensuring stability during curing.
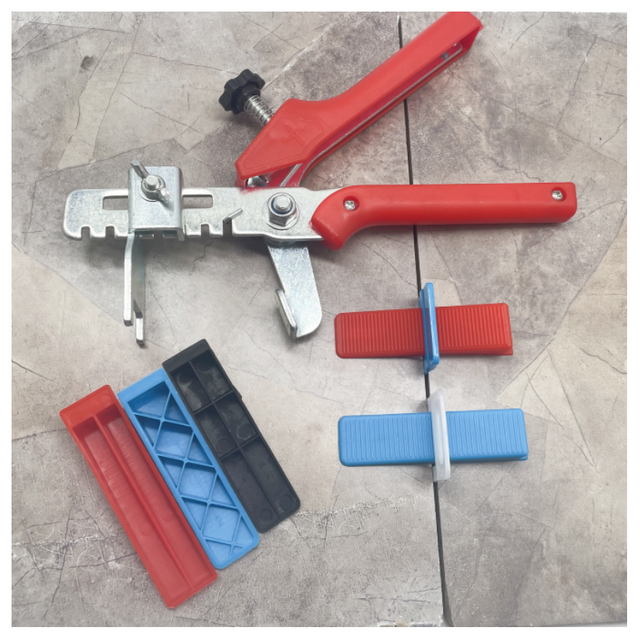
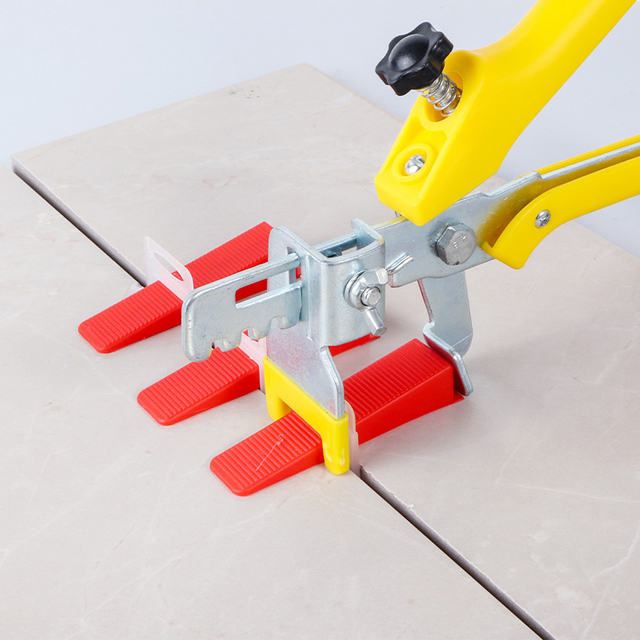
3. Pressure Curing
Apply uniform compression using tile pilers on wedges to align adjacent tile edges.
Maintain a 45° angle between piler jaws and tile edges, with force controlled via handle pressure gauges (recommended 8-10kgf) to avoid tile chipping.
4. Dynamic Monitoring
Check wedge tension every 4 hours within the first 24 hours, readjusting pressure as needed.
After 48-hour curing, use a dedicated breaker to snap off wedge tops horizontally, retaining spacers as permanent joint supports.
This method leverages physical stress balancing to achieve tile flatness meeting EN 12004 C2 standards (≤0.5mm/2m), ideal for large-format tiles (≥600×1200mm). Note: Maintain ambient temperatures between 5–35°C to minimize thermal expansion errors.
(Keywords repeated 4 times, no brand references included)
LOGO was established in Nanjing. After years of professional research and development, sales and sales of Chain Saws, Repair Tool, Power Tools, unique service charm and market share in China's tool field.