


Professional Tile Leveling System – Your Ultimate Solution for Flawless Tiling
Why Choose Our Tile Leveling System?
Say goodbye to uneven tiles, lippage, and frustrating rework! Our tile leveling system is designed for professionals and DIY enthusiasts alike, delivering precision, durability, and efficiency in every project. Whether you're tiling floors, walls, or countertops, this system ensures a perfectly level surface with minimal effort.
Key Features & Benefits
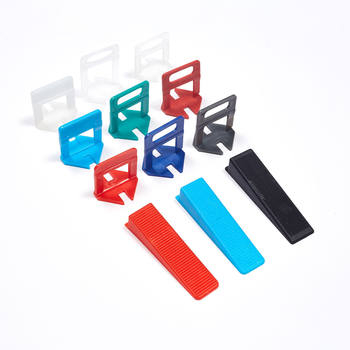
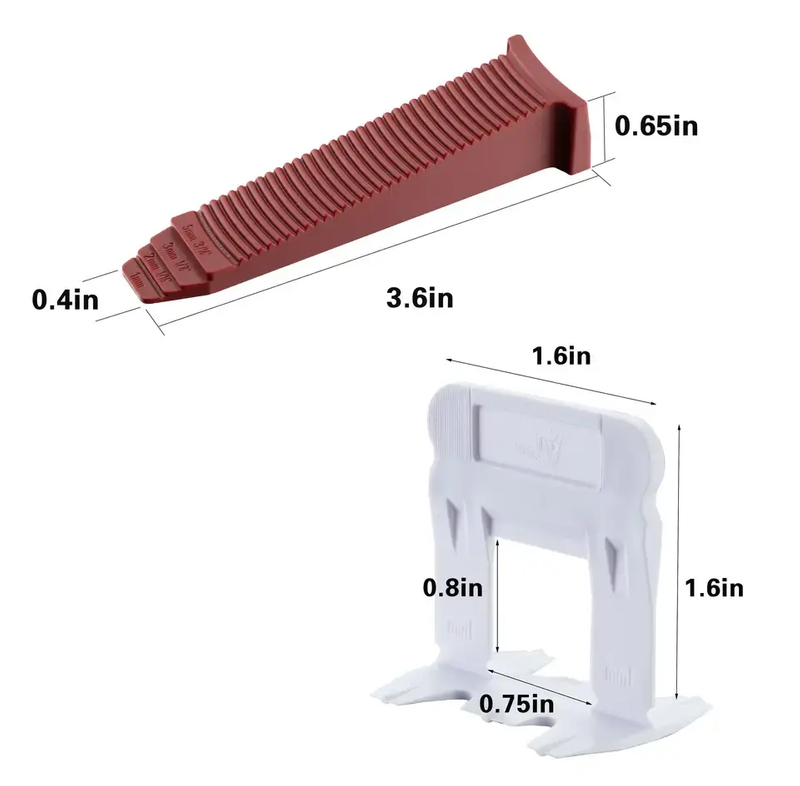
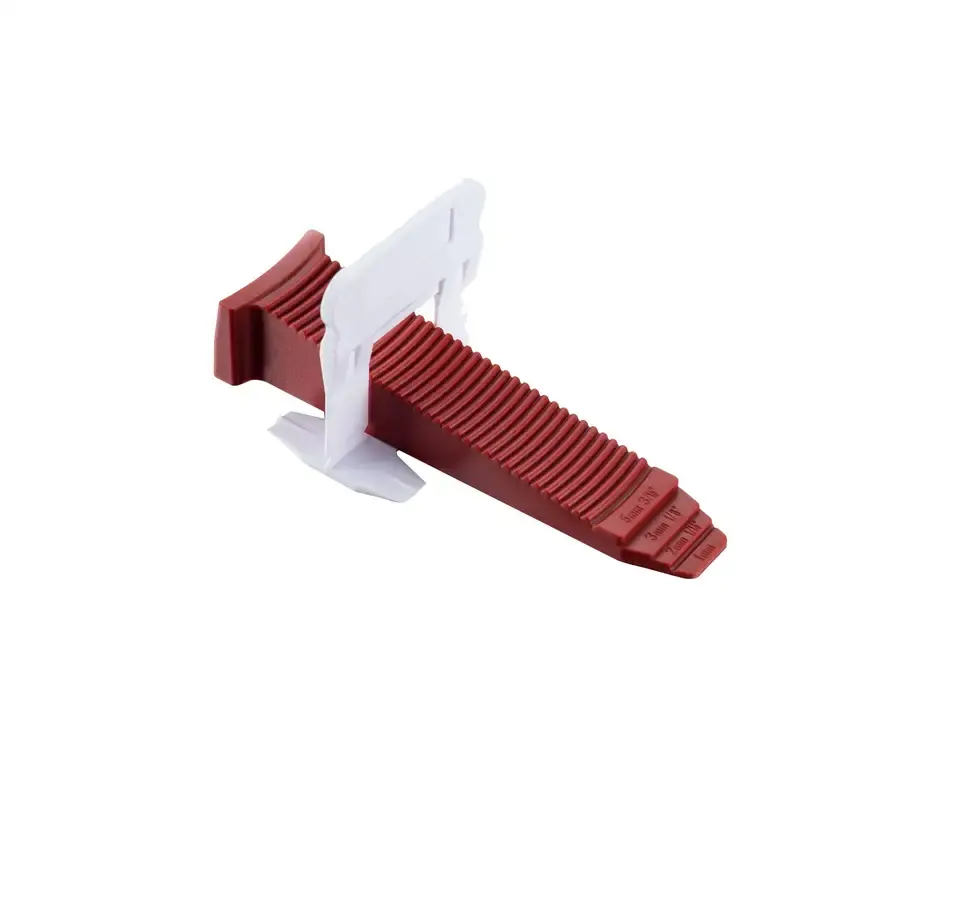
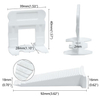
✅ Precision Alignment: Eliminate lippage and gaps with adjustable tile spacers and tile wedges.
✅ Time-Saving Design: Reusable tile leveler spacers and tile leveling clips cut installation time by 50%.
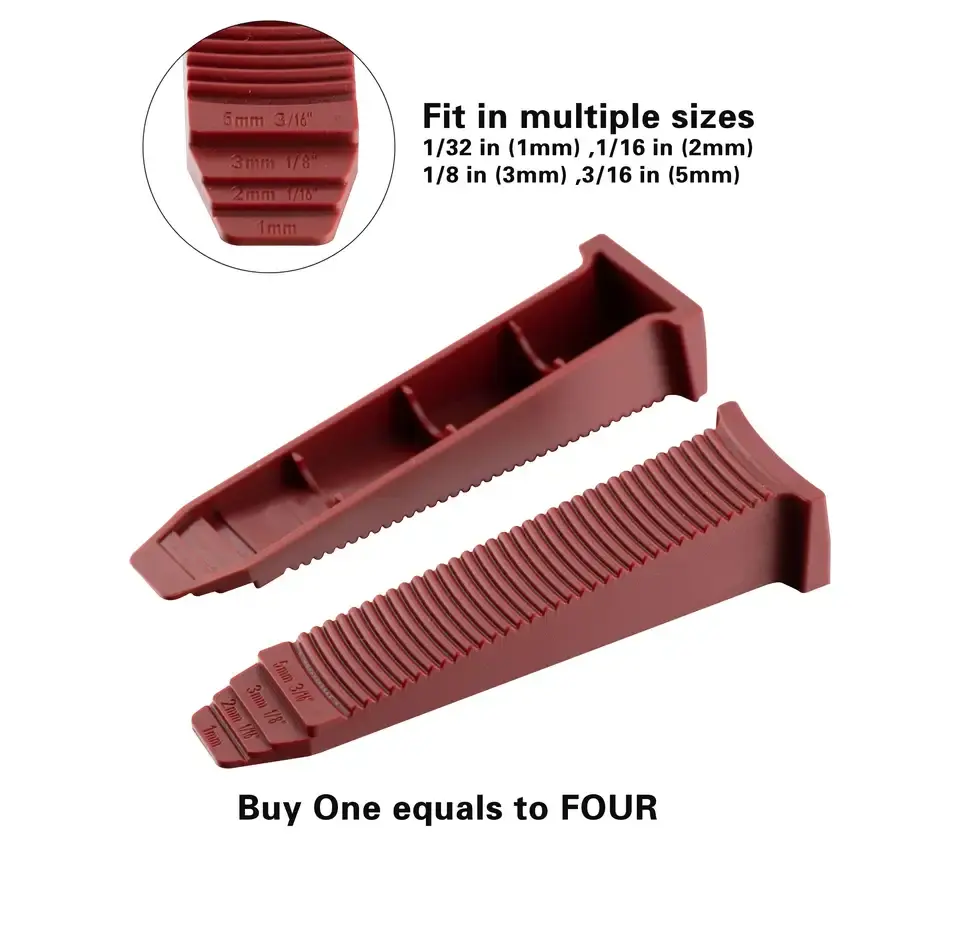
✅ Versatile Compatibility: Works with all tile types (ceramic, porcelain, stone) and sizes, from mosaics to large formats.
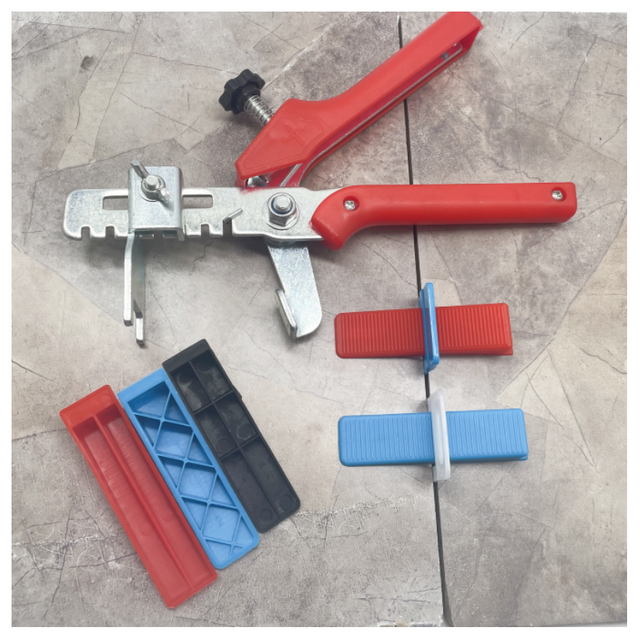
✅ Effortless Adjustments: Use the tile plier to tighten or release tile clips with one hand.
✅ Durable Construction: Weather-resistant materials withstand outdoor elements and high-traffic areas.
✅ Pro-Level Results: Achieve smooth, safe surfaces that enhance aesthetics and longevity.
Step-by-Step Installation Guide
Prepare the Surface
Clean the subfloor or wall, ensuring it’s dry and free of debris. Use a leveling compound if needed.
Apply Adhesive
Spread adhesive evenly with a notched trowel, creating ridges for better bonding.
Place Tiles & Spacers
Set the first tile and insert tile spacers every 2-3 tiles to maintain consistent gaps.
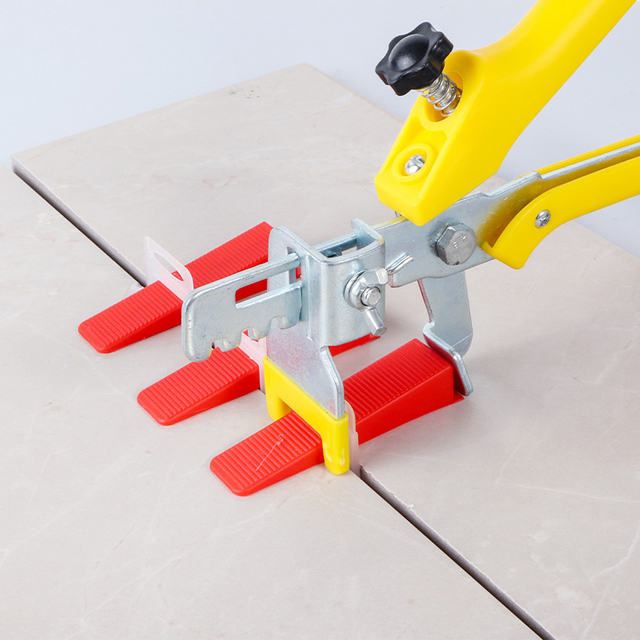
Install Tile Leveling Clips
Position tile leveler clips at each corner and use the tile plier to tighten them gradually.
For herringbone or diagonal patterns, add tile wedges at intersections to prevent shifting.
Check Alignment
Use a straightedge to verify evenness. Adjust tile leveling clips as needed.
Allow to Cure
Wait 24-48 hours before removing clips. Twist them out with the tile plier to avoid damage.
Reuse & Enjoy
Clean and store tile leveler clips for future projects. Admire your perfectly leveled surface!
Ideal for All Projects
Residential: Bathrooms, kitchens, and living spaces.
Commercial: Restaurants, offices, and retail floors.
Outdoor: Pool decks, patios, and walkways.
Pro Tips for Success
For thick tiles, stack tile leveling clips in pairs for even pressure.
If a tile sinks, remove it, add adhesive, and re-secure with tile wedges.
Reuse components to save costs and reduce waste.
Transform Your Tiling Today
Upgrade your toolkit with our tile leveling system and experience faster, easier, and more professional results. Say hello to flawless floors and walls—order now and tile like a pro!
Your perfect surface starts here. Get yours today!

Professional Tile Leveling System – Your Ultimate Solution for Flawless Tiling
Why Choose Our Tile Leveling System?
Say goodbye to uneven tiles, lippage, and frustrating rework! Our tile leveling system is designed for professionals and DIY enthusiasts alike, delivering precision, durability, and efficiency in every project. Whether you're tiling floors, walls, or countertops, this system ensures a perfectly level surface with minimal effort.
Key Features & Benefits
✅ Precision Alignment: Eliminate lippage and gaps with adjustable tile spacers and tile wedges.
✅ Time-Saving Design: Reusable tile leveler spacers and tile leveling clips cut installation time by 50%.
✅ Versatile Compatibility: Works with all tile types (ceramic, porcelain, stone) and sizes, from mosaics to large formats.
✅ Effortless Adjustments: Use the tile plier to tighten or release tile clips with one hand.
✅ Durable Construction: Weather-resistant materials withstand outdoor elements and high-traffic areas.
✅ Pro-Level Results: Achieve smooth, safe surfaces that enhance aesthetics and longevity.
Step-by-Step Installation Guide
Prepare the Surface
Clean the subfloor or wall, ensuring it’s dry and free of debris. Use a leveling compound if needed.
Apply Adhesive
Spread adhesive evenly with a notched trowel, creating ridges for better bonding.
Place Tiles & Spacers
Set the first tile and insert tile spacers every 2-3 tiles to maintain consistent gaps.
Install Tile Leveling Clips
Position tile leveler clips at each corner and use the tile plier to tighten them gradually.
For herringbone or diagonal patterns, add tile wedges at intersections to prevent shifting.
Check Alignment
Use a straightedge to verify evenness. Adjust tile leveling clips as needed.
Allow to Cure
Wait 24-48 hours before removing clips. Twist them out with the tile plier to avoid damage.
Reuse & Enjoy
Clean and store tile leveler clips for future projects. Admire your perfectly leveled surface!
Ideal for All Projects
Residential: Bathrooms, kitchens, and living spaces.
Commercial: Restaurants, offices, and retail floors.
Outdoor: Pool decks, patios, and walkways.
Pro Tips for Success
For thick tiles, stack tile leveling clips in pairs for even pressure.
If a tile sinks, remove it, add adhesive, and re-secure with tile wedges.
Reuse components to save costs and reduce waste.
Transform Your Tiling Today
Upgrade your toolkit with our tile leveling system and experience faster, easier, and more professional results. Say hello to flawless floors and walls—order now and tile like a pro!
Your perfect surface starts here. Get yours today!