You are here:Home » News » Industry News » Achieving Flawless Tile Installations with Tile Leveling Systems
Achieving Flawless Tile Installations with Tile Leveling Systems
Views: 0 Author: Site Editor Publish Time: 2025-12-04 Origin: Site
Achieving Flawless Tile Installations with Tile Leveling Systems
A tile leveling system is essential for professional tile installations, ensuring even surfaces and preventing lippage. Here’s how to use key components effectively:
Prepare Surface: Clean and dry the substrate, applying adhesive with a notched trowel for full coverage.
Place Tiles: Set tiles into adhesive, pressing firmly to eliminate air bubbles. For large tiles, use a rubber mallet for gentle tapping.
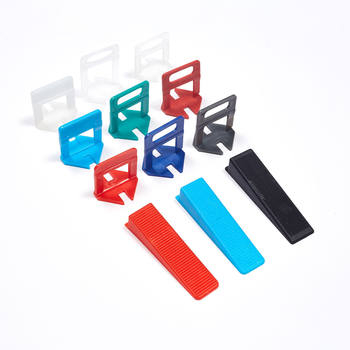
Use Tile Spacers: Insert tile leveler spacers at each corner to maintain consistent gaps. Check alignment periodically.
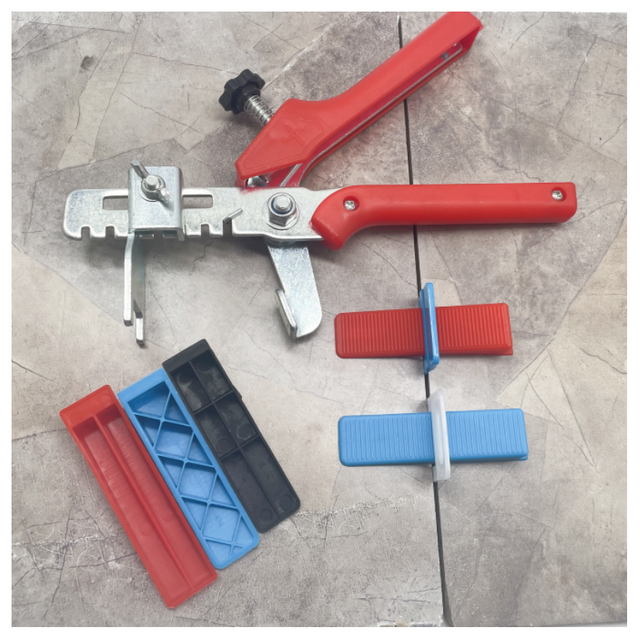
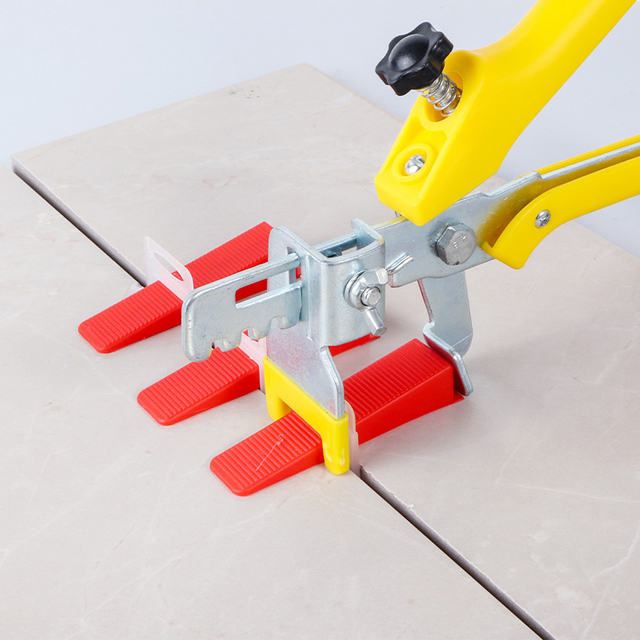
Apply Tile Clips: For large or challenging tiles, attach tile leveling clips at corners or edges. Insert tile wedges and tighten with a tile plier until tiles are flush.
Cure Adhesive: Let adhesive cure fully (typically 24 hours) before removing tile leveler clips and spacers.
Grout: Apply grout smoothly, filling gaps evenly. Wipe excess with a damp sponge.
Key Tips:
Ensure even adhesive application to prevent shifting.
Don’t skip tile clips or spacers; they guarantee long-term durability.
Regular maintenance, including sealing grout, enhances tile longevity.
By mastering these techniques, you can achieve professional-grade results with a tile leveling system, ensuring a smooth and durable finish.
LOGO was established in Nanjing. After years of professional research and development, sales and sales of Chain Saws, Repair Tool, Power Tools, unique service charm and market share in China's tool field.